Texture Replacements
Let's start with a simple texture replacement, understanding it will allow you to understand more complex asset replacements.
Prerequisites
- FModel
- Repak
- Unreal Engine 4.27 If you plan to do more than simple asset replacements.
- DDSTools If you do not wish to install Unreal Engine.
I recommend putting the tools in some directory like Tools before doing anything.
Replacing
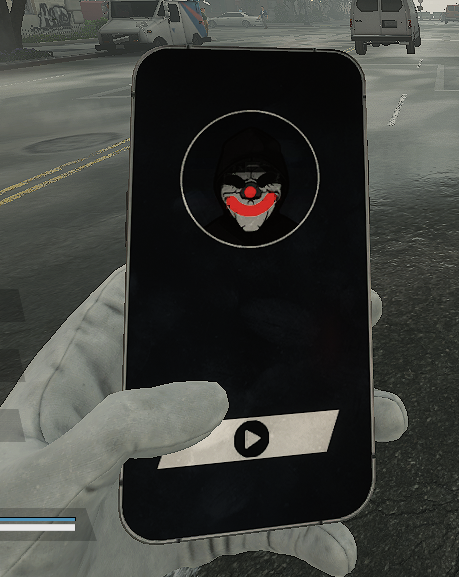
Find the texure you wish to replace, we'll replace the phone screen in this guide (PAYDAY3/Content/Environment/_Common/Interactable/MobilePhone_01/Component/T_PhoneScreenWithAlpha_). Go to the Using FModel page to learn how.
Edit the texture's png file as you'd like.
There are a few different ways to replace assets, we'll focus on two for textures.
Using Unreal Engine
This method is here mainly to show the simplest form of asset replacement that can be used for almost any type of asset.
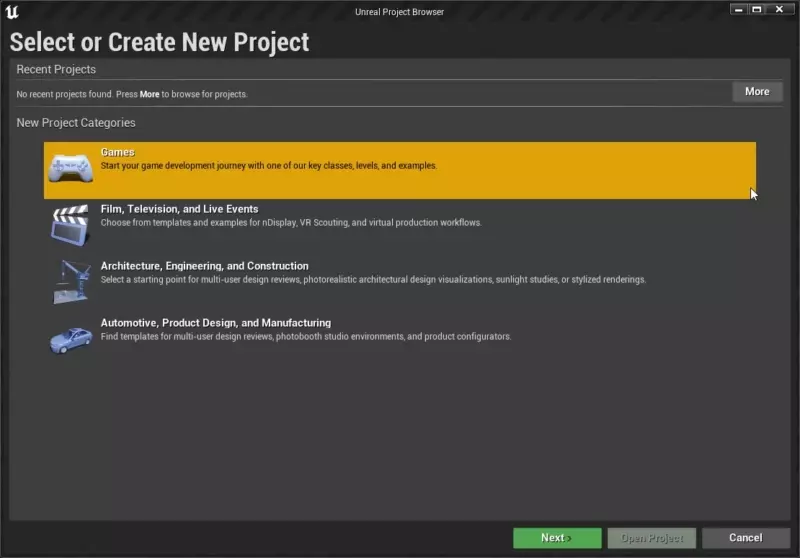
Open Unreal Engine and create a new project, name it PAYDAY3.
In Unreal Engine, paths already begin from Content, therefore you need to ignore PAYDAY3/Content when working inside Unreal Engine.
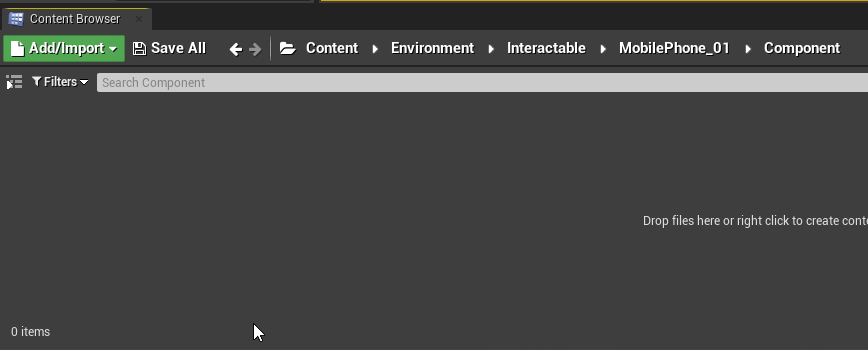
Go to Content Browser, right-click below and click on New Folder and replicate the directory structure of the asset you wish to replace.
So the end result should be like:
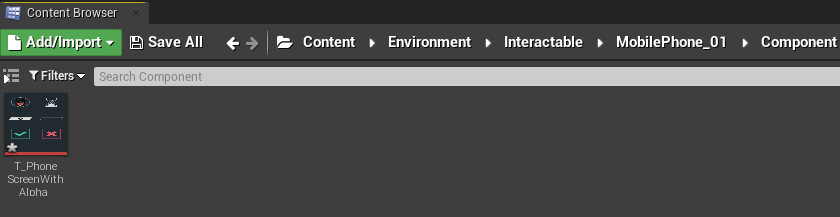
Now let's import our edited texture. The simplest way is to navigate to the directory and drag and drop your texture there.
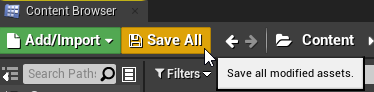
Click Save All to ensure your files are saved.
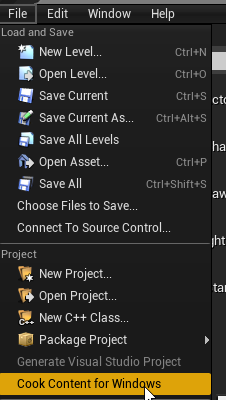
Next step is to cook the files, simply click on File and then Cook Content for Windows
Once done, the cooked files should be in Documents\Unreal Projects\PAYDAY3\Saved\Cooked\WindowsNoEditor\PAYDAY3\Content (Your Unreal Projects directory may be different).
Copy the folder there into some folder with repak in it so that it's in MyMod/PAYDAY3/Content/.
Using DDS-Tools
This method is mainly if you want to just replace a texture and not interested in any other asset types.
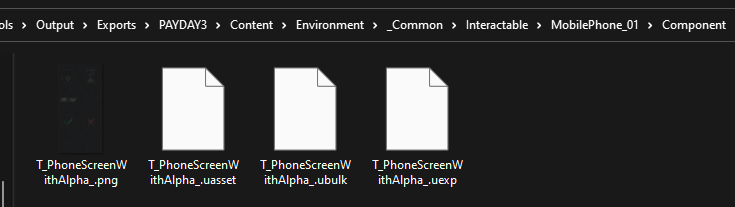
For this method you will need to additionally export the raw asset. Do the same as exporting the texture, but this time click on Export Raw Data (.uasset). You should now see 4 files:
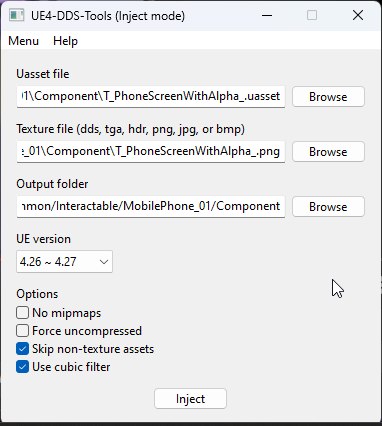
Open DDS-Tools and do the following steps:
- Point DDS-Tools to the uasset file (
T_PhoneScreenWithAlpha_.uassetin our case) - Point DDS-Tools to the image file (
T_PhoneScreenWithAlpha_.pngin our case) - Set an output folder, I recommend setting it to
ToolsDirectory/ModName/PAYDAY3/Content/Environment/_Common/Interactable/MobilePhone_01/Componentfor reasons you will see in the packing stage. (The path may be different depending on the texture you are replacing).ToolsDirectoryis where you placed the tools you downloaded in the prerequisites stage. - Set UE version to
4.26 ~ 4.27. After that you should have something like this:
Click inject and you are ready for packing.
The folder with the cooked texture should appear in the tools directory if you followed the recommendation.
Packing
Packing is simple using Repak, however first you must make sure you replicate the pak path.
In our case, the path is PAYDAY3/Content/Environment/_Common/Interactable/MobilePhone_01/Component.
This is exactly how it should be before packing.
If you followed through the guide, the directory structure should look like so:

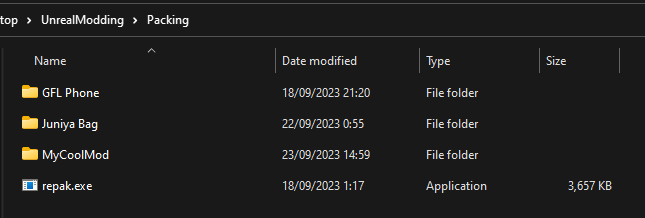
I recommend placing repak.exe where the mod folder is:
Hold shift and right click where repak.exe is, click on Open PowerShell window here. You will see a window popup.
To pack your mod execute the following command:
./repak pack ModName
You can pack as many files as you'd like into a single package and do not need to repeat the process for each replacement you do.
Your mod is now ready to be installed.